
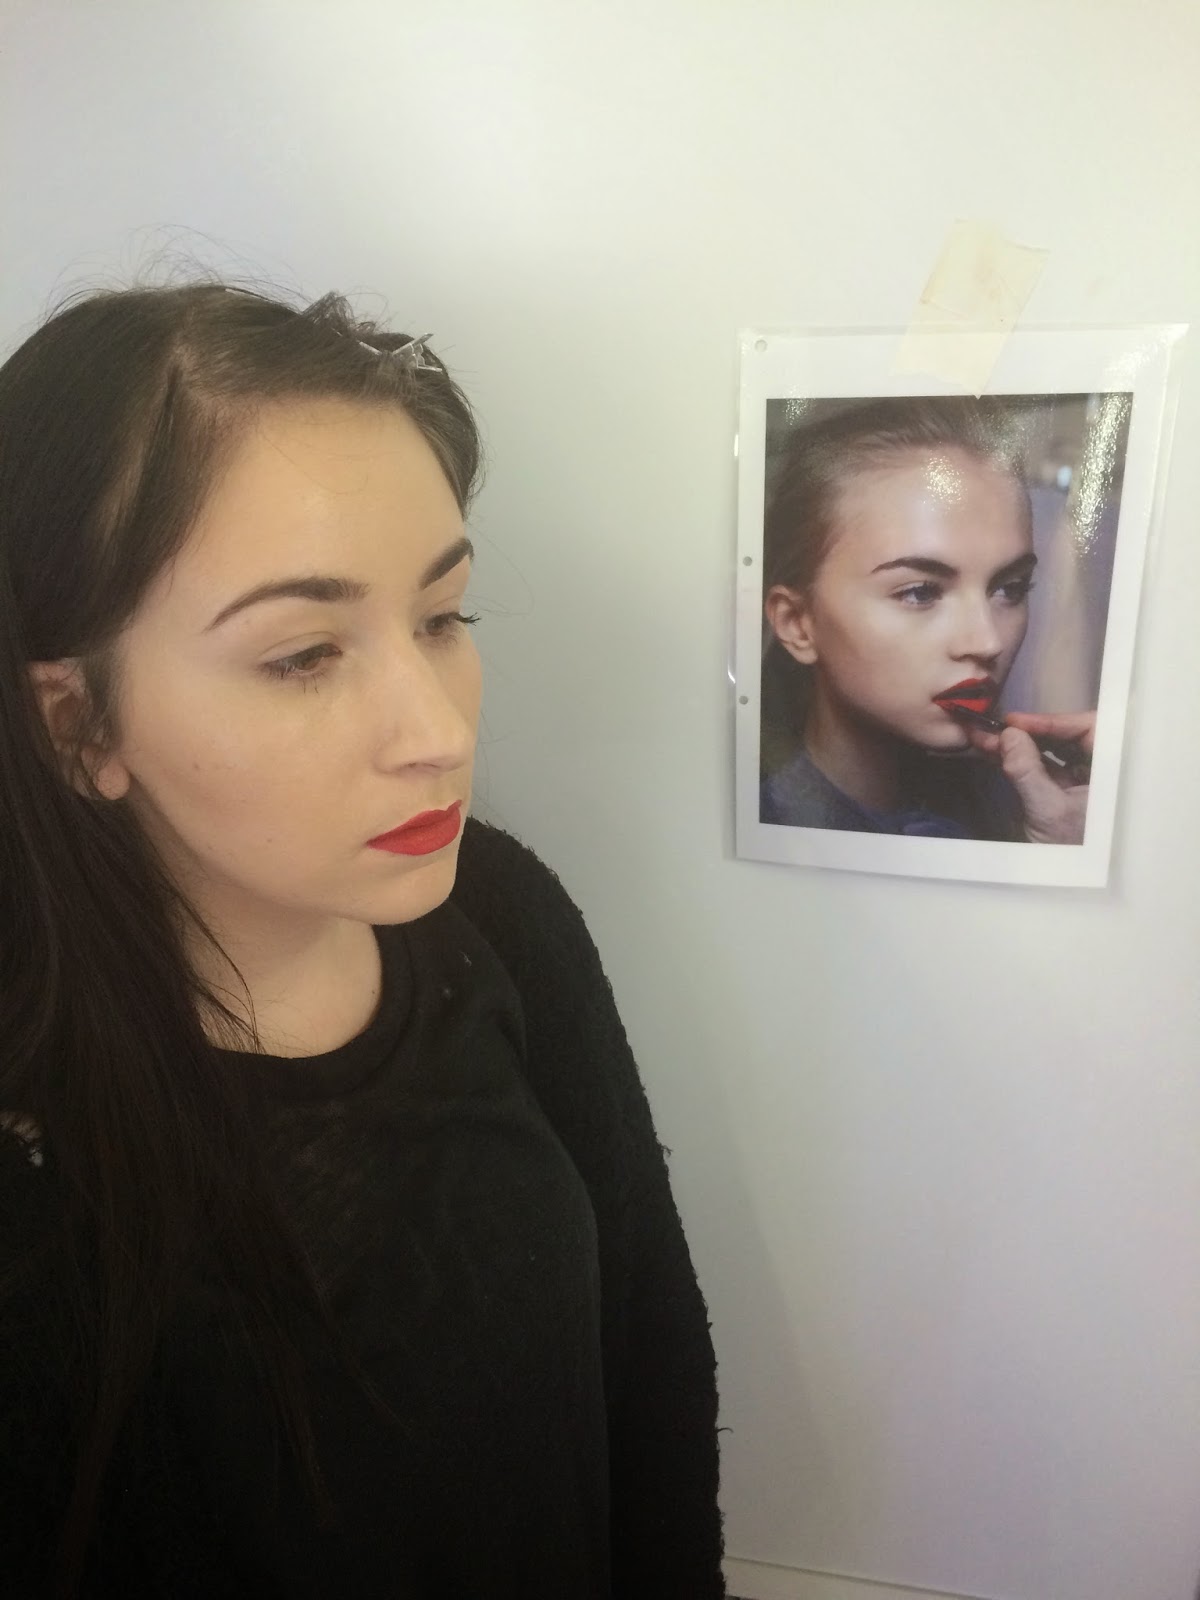
In todays work shop with Branka we worked on re creating a make up look that would be perfect for catwalk. Branka gave out a random selection of photos to copy. I was given this lovely classic red lip look. This look would be perfect on Catwalk for someone like Scarlotte Johanson for example.
Above is the look that I was given to re create. To begin with I cleansed toned and moisturised my models face. Although she had already taken her make up off there was a lot of excess mascara around the eyes I really wanted this to be completely gone given that this is such a clean look. Working cleanly and neatly I used my pop up bin on my work station placing all the dirty cotton pads out of sight. I then began with the foundation for this I used Mac Face and Body CI. My models skin is very pale and this was the lightest that I had. I also used Face and body because the look I was re creating has a very subtle base that looks extremely natural and so I didn't want to give my model ay tan or colour. With a clean foundation brush working on the back of my hand which had of course been sanitised I worked the foundation on the back of my hand for a good minute I did this to warm up the foundation and to thicken it slightly for denser coverage. I found in the past applying Mac Face and body can be difficult if applying it straight on the face because its extremely thin. I also think the coverage is a lot better once it has been warmed up on the back of the hand. Once it was to the right consistency for me I applied it to my models face working from the centre outwards. I always start from the centre when applying foundation so not to leave a foundation line around the outside of the face, this doesn't happen because I blend outwards using minimal product because this was an assessment I spent a lot of extra care in making sure the coverage was even and smooth taking it right up to the models ears and blending down the neck as you would if this was for a real catwalk show. For the under eyes there wasn't much darkness only a little of which I covered using the Pink from my Mac Concealer pallet.
I powdered the face but not all because as you can see in my Visual my model does have some dewiness. Because of this I decided to powder the T zone area only.
My second step was to focus on the highlighting of the face. In the look I recreated the models face has really clearly highlighted areas such as the front of the nose, around the eyes and the chin. Because my models skin was quite pale I wanted to create a highlighter that was obviously even lighter then my model to get around this using my spatula I took a little bit of Kryolan White from my greasepaint pallet and mixed it in with an even smaller percentage of Mac Face and Body C1. With lots of mixing this created a colour that was lighter then my base. I applied this to the areas I wanted to highlight continuously looking back at my visual for insurance. The foundation brush I used didn't blend this in well in my opinion I felt I needed something softer so I used a small blending brush to apply the highlighted colour onto my model. This worked a lot better in some areas I also used my fingers just to get a perfect blend from base to highlighted area.
It was now time to work on the shading of which I allowed my self 5 minutes to do given that we had 45 minutes and I wanted to allow plenty of time for applying the lip colour. To Shade and Contour the face I used a Mac Bronzer. I applied this to the cheeks and temple area. I also applied it to the jaw line as seen in my visual. When I was applying it to the Jaw line I took it right up behind the ears. I did this to provide some flow to the look. I think its important that make up goes some wear and has some direction, especially if it is to look natural.
 When it came to my next step which was filling in the eye brows I was pleased because my models eye brows wear very full and had a beautiful shape this I feel made my job easier. In order to give them a similar shape to the one in my visual I shaped them with eye brow gel. I made them a lot more rounder to match the model in my visual. I then filled them in with a small clean angle brush and used my Ben Nye pallet mixing a combination of two shades of lighter and darker browns. I filled in the brows on the areas that needed filling such as the front were there was less hair. I also went along the hairs of my models eye brows with the angled brush just to enhance the colour ever so slightly.
It was now time to do the lips which I had purposely allowed myself 10 minuets to do. This is because lips are my least strongest part of make up and I needed to allow room for error. Which was lucky I did because I did face some problems along the way. This is because I lined the lips using MAC Cherry Lip Liner.To clean the pencil I sprayed it with IPA and then sharpened once. I lined the lip using the liner creating a round cupids bow the same as the one in my visual. Because I have been practising lips a lot I didn't struggle too much with lining the lips. My problem was when I stepped back and looked in the mirror the colour of the lip liner was completely wrong. Cherry is a very dark and cool red and the models lips were a very warm almost blood orange red. I was running out of time and didn't have enough time to wipe off and reline the lips so I worked on correcting the colour. By this time I had realised that using Ruby Woo red was going to completely change the look as well as this too was not the right shape of red. I quickly looked in my make up bag and pulled out my Kryolan Greespaint Pallet. Int there was the perfect blood orange colour. So I used this to fill in the lips, although it was the perfect colour I still had the problem of the cherry lip liner around the lips which looked extremely obvious. I used my smallest round blending brush to blend out the lip line blending it into the lip colour.
I was really pleased by my efforts because this worked really well and my feed back from Branka was that she never noticed that the lip line was blended off.
Despite this though I wasn't happy with the finished lips because I feel the overall shape especially on the top lip could have been slightly bigger and higher. I feel I refrained to much to the natural shape of the cupids bow and didn't take it high enough like the one in the
 |
| Finished Look |
 |
| Finished Look |
No comments:
Post a Comment